Art Toolkit
The Art Toolkit is now upgraded! Learn about the new version and visit the Shop to purchase.
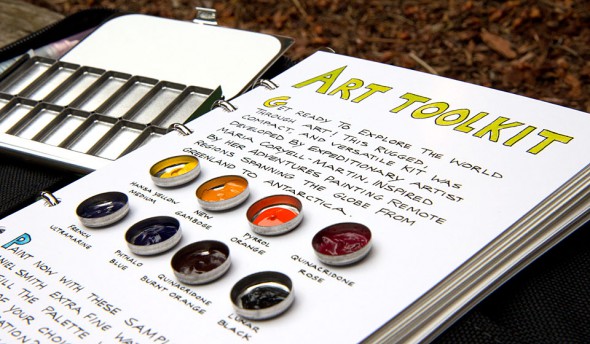
I’m delighted to announce that I have a new Art Toolkit available in my shop! Throughout my travels painting around the world, I’ve been constantly experimenting with materials and working to develop a compact, all-in-one, durable system for ink and watercolor sketching. The Art Toolkit is based on my current sketchbook and all of the materials are field tested to meet my own high standards for quality. Watch the video for a full tour!
The sketchbook/binder is my solution to having too many partially filled spiral-bound sketchbooks taking up room on my bookshelf. I much prefer to fill a binder with a mix of paper that I can easily re-arrange and archive when I’m home. The 5″ x 7″ standard sized pages of the kit also fit easily into frames or photo organization systems.
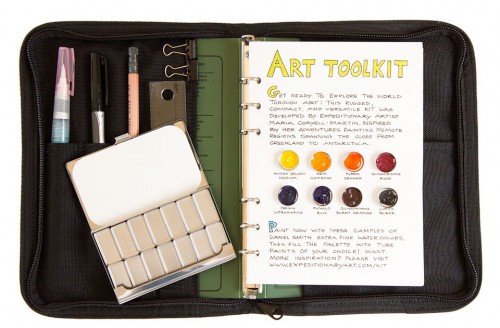
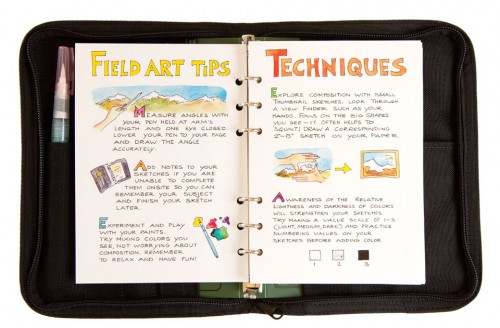
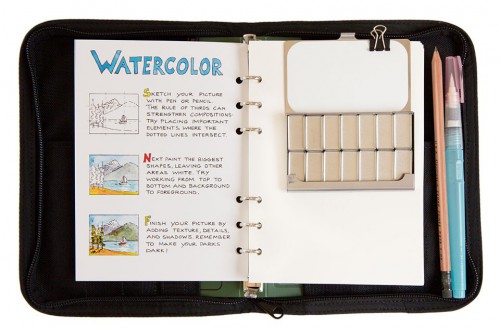
Art Toolkit components
- Cordura zip cover, measures approx 6.5″ x 8.5″ when closed
- 6 ring binder that holds 5″ x 7″ paper
- Niji waterbrush pen, Sharpie fine pen, pencil, ruler, and two binder clips
- Inserts with 8 sample watercolor paints and field art techniques
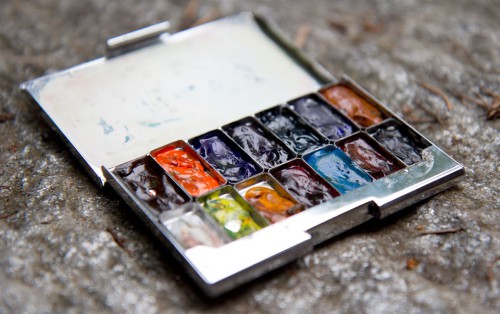
- Palette (approx 3.75″ x 2.24″) with 14 removable pans on a magnetic base
- Reusable towel and two binder clips
- 10 pages of Arches 140lb bright white watercolor paper
- 10 pages of Lenox 100 vellum paper
- Paper refills are available in my shop, or cut paper of your choice at home! The Franklin Covey compact hole punch is compatible with the binder.
I’m especially excited about the palette. Over the years, my pocket watercolor palettes have ranged from Altoids tins with clay mixing wells, to tins and small boxes with plastic half pans. My main complaint with them was that they were bulky and I couldn’t fit everything in one kit. Here’s an overview:
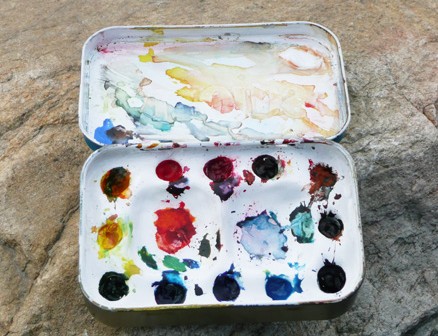
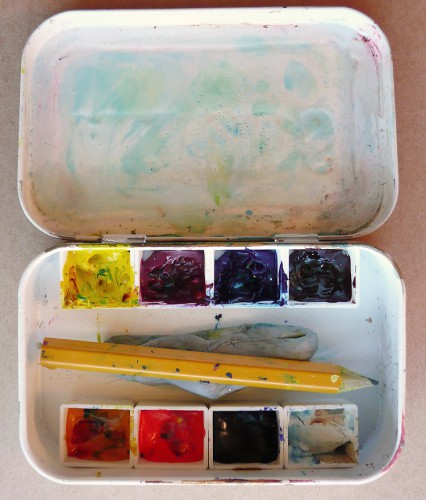
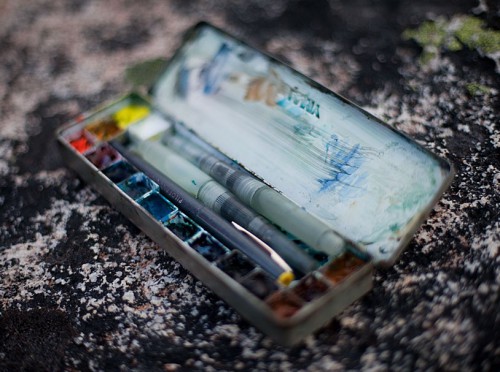
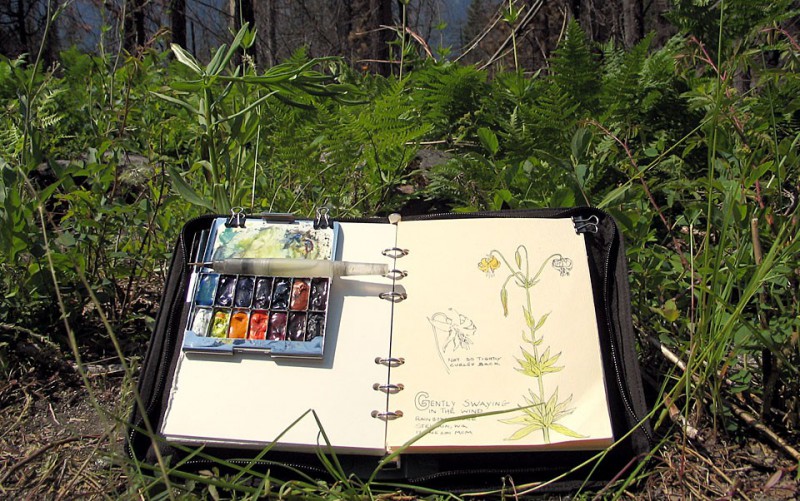
My new palette is a prototype of the one included with the Art Toolkit. The design is slim, compact, and fits nicely into the back pocket of the cordura kit cover. A fantastic feature of the palette is the magnetic base that strongly secures the 14 pans while also allowing them to be removed and rearranged. The empty pans can be filled with tube paints of your choice. Eight samples of my favorite Daniel Smith ExtraFine watercolors are included with the kit. After adding fresh paint to my pans, I typically let it dry overnight before using it:
Here’s my own Art Toolkit in use during a hike I took around Stehekin last month:
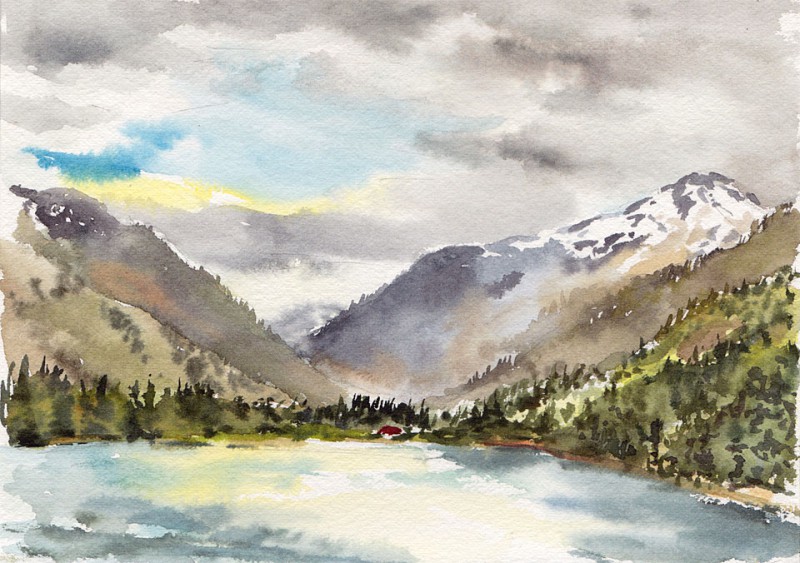
One more sketch from Stehekin, completed with supplies included in the Art Toolkit:
Feel free to contact me with any questions about the Art Toolkit, and happy sketching!
22 Responses to “Art Toolkit”
Michael Shope
This is great. I want one!
Sandra Andrews-Strasko
This looks like just the thing to help me get back into landscape painting, since I gave away all my supplies when I left the USA.
Ileta
Hi, it’s me again. Thank you so much for sharing. I already have an extra binder and a small watercolour kit so I am planning to make my own. BTW for those who don’t have a six hole punch, I just use a single hole punch (it looks like pliers and you can buy it in office or school supply stores) and just follow the holes of existing binder pages.It takes some time, but if you do a few a day its not too hard. But never thought to use watercolor paper before! Love your art!
Karen
I am so happy to have found your journal kit. It is so well thought out and portable. I would like to get it for my daughter for her birthday (April 3), but will order it when you return and give it to her for Christmas, or for no reason at all.
Thanks for sharing!
Karen
Maria
Thanks for the note and compliment, Karen! Keep in touch and please let me know if you have any questions.
Candy P
I really like the idea of your Art Toolkit. It looks like it would be possible to pull the 6 ring binder out of the cover, is that correct? I’d like to be able to put a 5×7 spiral journal in the cover instead.
Thank you.
Candy P
Maria
Hi Candy, you can remove the binder from the cover. Your 5×7 spiral journal should fit with wiggle room, the binder is about 5 3/4″ x 7 3/4″. Let me know if you have any more questions!
Karen P
I love the new palette except for one thing: nowhere to mix colors. The lid is mostly flat, rather than having a lip all around, so it can’t serve as a tray. I DO mix on the paper a lot (working wet-in-wet is my favorite), however there are still times when I want to mix on a palette. How have you been mixing colors with this palette? Thoughts/tips?
Karen P
Hi again. Just to clarify the question I left a moment ago: the palette I’m referring to is one I received just a couple of weeks ago, and it looks different from some of the ones on your website/blog, in regard to how much or how little of the lid is lipped. Could it be that older versions had more of a continuous lip and were therefore more suited to using a mixing well? With the version that I recently received, how –is at all– does one use the lid for wet mixing? Thanks, I’ll look for your reply.
Maria
Hi Karen, I apologize if there was any confusion about the the mixing lid, I do have some photos on my blog of an early prototype palette I’ve used that does have side lids, but the tin is heavy and expensive. The pocket palette in my shop and in other photos is the same version I’ve offered since I launched the Art Toolkit in 2011. I have been using the Pocket Palette lid for mixing without problem since then! I primarily use water brushes and find the paint puddles nicely on the mixing surface and doesn’t run (or collects in the hinge when I have have it clipped to my paper on angle). When I want to work larger and more wet in wet, I carry brushes, bigger paper, and an additional mixing palette (I use this slant well version:http://www.danielsmith.com/Item–i-146-030-001-LIST).
Karen P
Thanks for your reply, Maria! What you say makes total sense regarding the prototype versus the product resulting from your design research. I DO like this product VERY much, especially for how thin the pans are, which enables the entire unit to be space-saving and light-weight compared with anything else on the market. I’m happy I bought mine (in fact I bought two, one to keep and one to gift). From my perspective, the trade-off of no lips on the mixing area are well worth the compromise if that keeps the price down and the weight down! Also, I have noticed that the mixing area works great when I am not working super-wet nor large… which is after all what the palette is designed for.
That said, as I mentioned in previous comment, a quirk of my method is working very wet, even for field sketching. A good illustration of this is the fact that I rarely use my Niji waterbrush pens (as wonderful as they are!) because I empty them of water so quickly. My solution is to carry a small lidded tin (an old, recycled altoids can) for making bigger wet puddles than will fit on the pallet lid.
Thanks again for your reply to my comments. I am a very happy customer!
joanna herbage
Hi there :)
Do you currently have these kits in stock and if so, how soon could you ship it?
Thanks from Joanna
Maria
Yes! I just finished another batch. I’ll send you a note to follow up. Cheers, Maria
Franco Barbieri
Your palette is the best that it’s possible to find in the world. It’s small but it provides an excellent and great service: Very well made, sturdy, simply to use. It’s the only really foldable palette in the market. To clean it I use, as for all other plastic palette, the WD-40Oil with a paper towel. Yes, it’s a lubricant for all purpose, but it has some cleaning agents that really work without damage or dissolve any type of plastic. Being oily does not harm or create micro scratches on the surface but clean very well also the oldest stains and the most difficult as those who leave colors such alizarin crimson or viridian.
Maria
Thank you for your kind words, Franco, and for your cleaning suggestion! I’ll try the WD-40 oil, that sounds like a great solution.
Lynn Manning
Hi Maria,
I have been enjoying your blog for about a year now and drooling over your tool kit. I was wondering if you could explain again your reason for using a binder system as opposed to bound sketchbooks. How do you store your completed paintings and are the holes a problem (distraction) when matting your paintings. I know you have touched briefly on this before, but I was hoping you could take the time to expound on it.
Thank You for being so inspirational!
Maria
Hi Lynn, thanks for your question! I’ll try to do a more in depth blog post on this soon, but in short, I found myself with stacks of unfinished sketchbooks, especially after my travels. Moving over to a sketchbook/binder system gave me the flexibility for mixing and matching papers, and easily archiving sketches. I typically store my sketches in an archival photo box or album and just matt over the holes when I frame them.
Alan Wells
Do you have any of your sample colors for sale?
I love your items and website.
Thanks,
Alan Wells
Maria
Thank you, Alan! I do offer a “Pocket Color Guide” which includes 8 sample colors in my Shop. Cheers, Maria
Susan Bowen
Your kits and palette are truly a stroke of genius! I’m trying to decide which kit to buy. Both have plusses. The thing I’ve been struggling with is how to balance a larger sketchbook with a hand-held larger palette (without wishing to set up an easel). Your kits solve that problem!
Gloris
Is this tool kit still available?
Maria
Hi Gloris, I might have a few kits still around my studio, I’ll email you with details! Best wishes, Maria