Spring Green

During the past few weeks, the landscape around my house has just exploded with green. It’s been cultivated by warm weather and days of rain, which are productive for studio work. I recently finished the painting above and thought I’d share a bit of my process. It’s by far the greenest and most detailed painting I’ve ever completed! First, my inspiration was a large field sketch I completed a couple weeks ago using my new tripod.
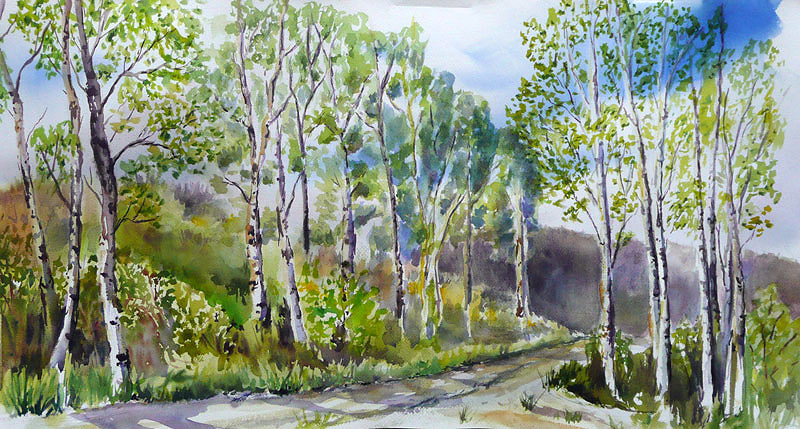
I liked the general composition, and sketched out ideas for painting the Apsen trees more densely, exploring the patterns of trunks. Once I finalized my drawing (done lightly with a 2H pencil), I used brown packing tape and a razor blade to mask out the tree trunks.

Next I wet the paper and began to wash in colors, using Daniel Smith’s hansa yellow medium, pthalo blue (red shade), pthalo green, quincridone rose, and quinacridone burnt orange. (My color inspiration came from Molly Hashimoto’s lovely Alder Demonstration). As some areas dried, I began to add more detail.

Working my way from the background to the foreground, I defined foliage and painted the trunks. I used a limited palette, working only with the five colors listed above.


I continued adding patterns of light and dark to the foliage and trunks.
Finally I added the shadows in the road and defined the grasses.
To complete the painting, I punched up my shadows to emphasize value changes. I keep in mind the advice a professor of mine in college once gave me, “make your darks dark!” Once the marks I was making were no longer making an appreciable difference to the painting, I declared it complete! (Please note, the colors between these photos shifted as the light changed in my studio.)
4 Responses to “Spring Green”
Matthew Nienow
Thanks for sharing your process! Really nice to imagine all the layers under the final product.
Soumaila CAMARA
Hello Maria,
I very happy to revisit your fantastics works that enjoy me to much.
Good continuation to you.
Thanks.
Soumaila
Miriam
Dear Maria,
It’s so nice to see how you work with the watercolours. It’s very inspiring. Thanks for still sending me your e-mails.
Best regards
Miriam
Elisabeth
Maria,
A beautiful painting, thanks so much for sharing the process you used to create it.
Inspiring :-)
Elisabeth